
An Illustrated Guide to the Biscuits
I'm continuously updating the process for making my biscuits. A few batches ago, I took photos!
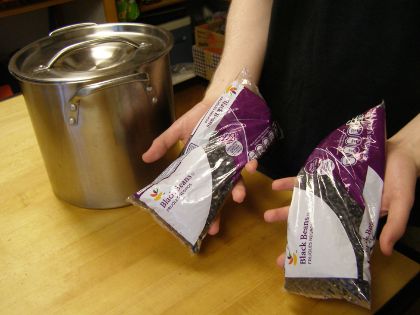
I start with these one-pound bags of beans (two cups dry). For this batch I used two bags, but now I usually use three. I put the beans in the pot, then fill it with water to about three times the depth of the beans, and put it in a refrigerator to soak overnight.
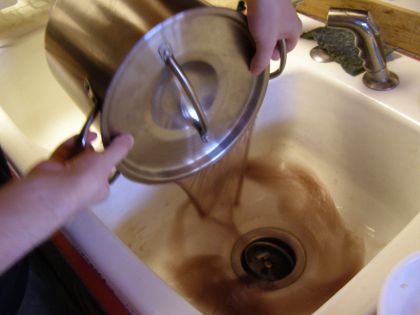
Then in the morning, I pour off the water. Usually the water is less brown and more purple – I neglected to refrigerate this batch overnight. Good thing I didn't get sick from it.
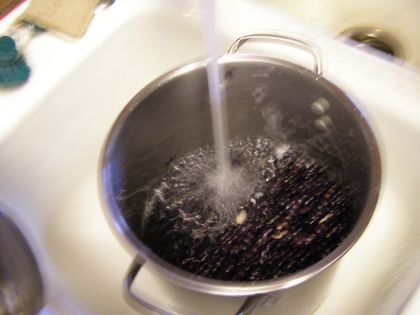
I refill the water, then pour it out again, to rinse the beans. I repeat that a couple of times. I use hot water for this, so that the beans warm up (so they'll boil more quickly in the next step).
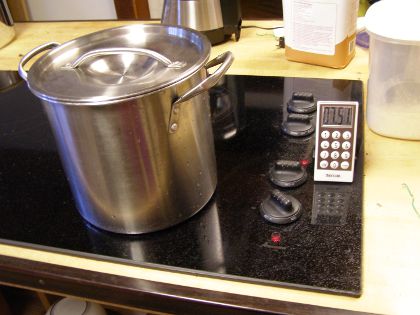
Then I boil the beans for half an hour on the electric stove you see here. Since this batch, I've started putting a teaspoonful of baking soda in with it, which makes the beans softer.

Remember to tie back your long hair before messing with sticky things!
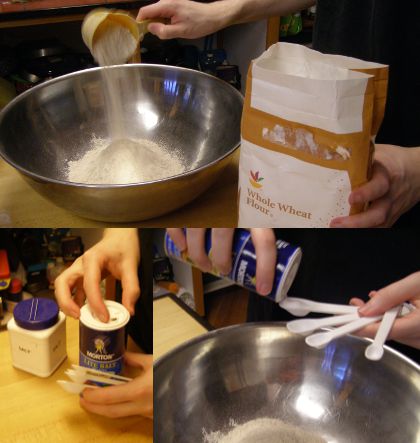
While I wait for the beans to finish boiling, I add the dry ingredients. For the usual amount (6 dry cups of beans), that's:
- 5 cups whole wheat flour
- 2 tsp table salt
- 1 tsp potassium salt (KCl)
- 10 grams of eggshells (about two large eggshells)
Since then, I've started adding quick oats to the mix, but I haven't settled on how much. I'll probably choose something like 3.5 cups flour, 4 cups quick oats. (The oats are less dense; by weight, 4 cups quick oats is the same as 2.5 cups whole wheat flour.)
I've also experimented with a bunch of other ingredients. I'll write about that at the end of this post.
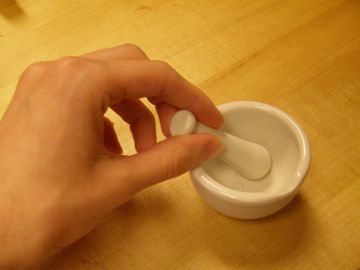
I used to grind up the eggshells with this cute little mortar-and-pestle, and mix them with the other dry ingredients. Now I just throw them in with the beans and oil (see below). Hand-grinding them made smaller bits, but was a lot of work.
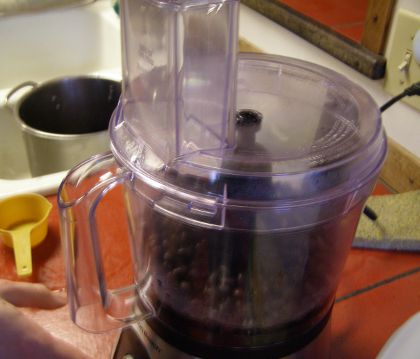
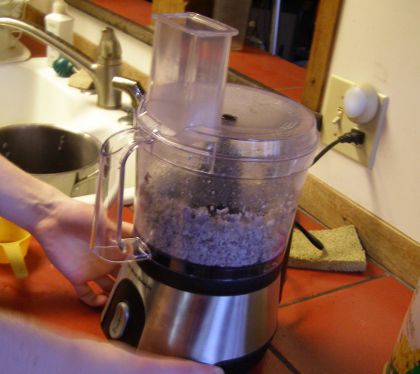
To help me mash the beans, I actually bought this food processor. I got a refurbished one for $43.1 I've already saved more money by switching to this diet than I spent on this object. (These biscuits are now about 80% of the food I eat.)
There used to be a complex little ritual in here, in order to cool off the (just-boiled) beans enough to touch them, without letting them dry out and get tougher. Since I started using baking soda to soften them, I don't need to do that. Now I just pour them into a colander.
At first, there was a problem with using the food processor: a lot of the beans stuck to the plastic sides, so they didn't get chopped up.
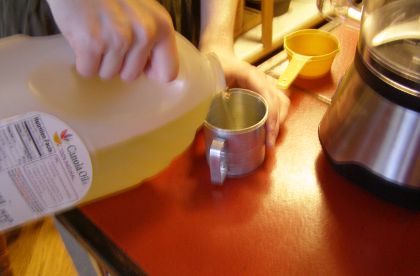
I solved that problem by putting the canola oil in with the beans before running the food processor. I'm aiming for 3 cups of oil total, in about 18 cups of wet beans. So I put in two cups of beans at a time, with one-third cup of oil. (That seems to be the quantity the food processor can handle best.) And now I also put in the eggshells in with the first two cups of beans, after I break them up a bit by hand.
Then I get this mess. It's been a lot smoother since I started using the baking soda to soften the beans.
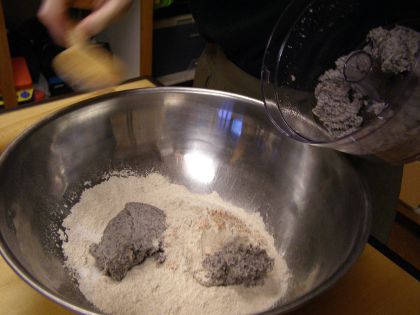
Then I dump them in with the dry ingredients. Eventually everything is in the bowl and I can mix it together.
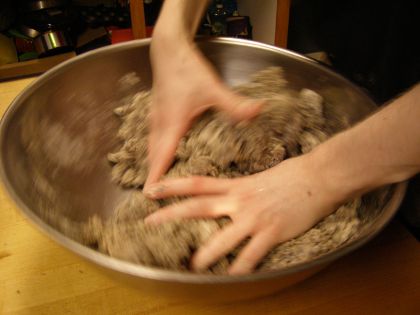
Mixing it is a challenge! Sometimes it is easier to use my hands directly than to use a spoon.
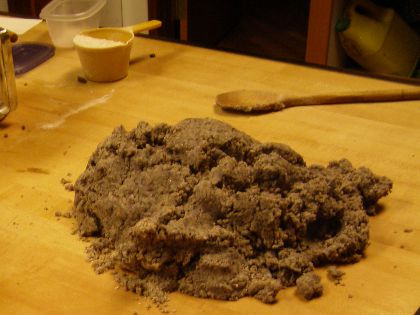
Eventually I can dump it out on the counter and start kneading it.
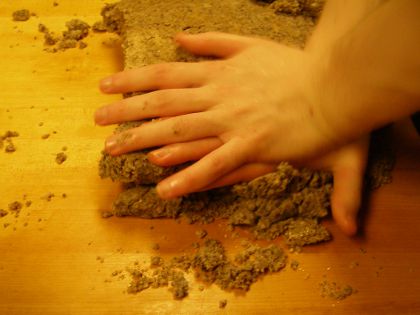
After some kneading, it starts to become a coherent dough.
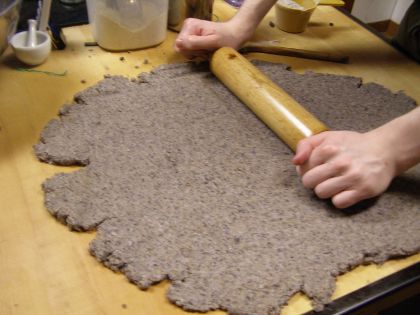
Finally, I can roll it out flat with a rolling pin.
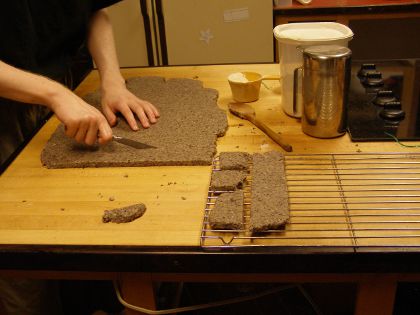
I cut the dough into strips to cook it. On the racks, the biscuit strips are exposed to the air on all sides, so they dry faster.

The final arrangement, ready to go in the oven.
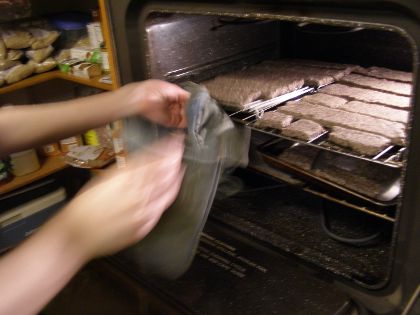
And it goes in.2
I set the oven to 250°F (121°C), and then I set a timer. Every 20 minutes, I open the oven door a little to let out the steam. I keep doing this until not much steam comes out. That happens after a few hours. (It doesn't always take the same amount of time, and I don't understand everything that affects that process.) After that, I turn off the oven, but leave the biscuits in the (still hot) oven overnight.
And then I get these great biscuits! In fact, I ate one while I was writing this post.
But my sibling, who took these photos for me, has problems with eating wheat products. So we've been trying to design an alternate recipe without wheat. The trouble is, the wheat is what's holding the biscuit together in biscuit shape. We tried replacing it with corn meal, oat flour, quinoa flour, rice flour, and buckwheat flour. None of them except the buckwheat flour held together at all. They disintegrated if you tried to pick them up. And replacing wheat with buckwheat still made a weaker biscuit, although at least it was strong enough to pick up.
Oddly enough, what made the toughest biscuit was combining a little buckwheat flour with a lot of quick oats. It seems like the oats give the biscuit some structural strength, while the buckwheat keeps it from just falling apart. I didn't record the exact quantities, though.
– Eli
- It came with a little card that said, essentially, “Thank you for buying refurbished products! We're not going to give you as much of a warranty as usual.” It has worked quite well so far, even after I accidentally dropped it from the counter onto the floor. back
- Actually, it didn't quite fit this way, and we arrange the racks differently now, and I don't have a good photo of that. Not that it makes a difference to you, dear readers, unless you happen to own exactly the same racks and same oven. back